Are you an active person? Or perhaps you are training for a grueling physical activity like a Spartan race or half-marathon? If you happen to be an active person (on and off the yoga mat) then we’re guessing that on any given day, parts of your body including your hamstrings, calves, and inner and outer hips may be pretty dang sore. This soreness also results in extreme tightness. Luckily for you, yoga can help loosen these muscles and improve the time it takes to recovery from your training regimen.
Here are five of the most effective yoga poses you can do to combat the nagging pains associated with an active lifestyle.
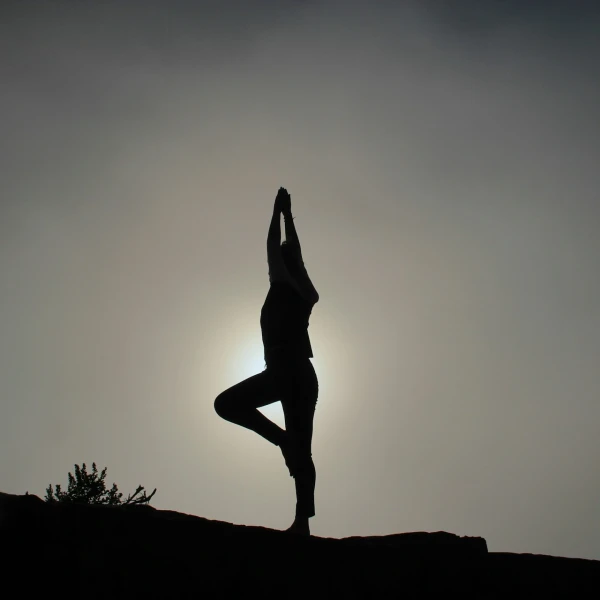
1. Low Lunge For Hip Flexors
Anjaneyasana is a pose done standing, with the back bent backwards like a crescent moon while both arms are raised and stretched above your head. Your front knee would be fully bent so your back knee would reach the floor with the entire back leg stretched.
Benefits
- Gives your mind some calm and peace
- Expands chest, lungs, and shoulders
- Improves balance, core awareness, and concentration
- Gives your thighs endurance and stamina
- Stretches your Iliopsoas, Rectus femoris muscles, Sartorius muscles
- Strengthens your supporting muscles for the knees
Be Careful if You
- Have a knee injury
- Have high blood pressure
- Have neck or spinal injuries (this pose can be altered where your eyes are looking forward or downward)
Step-By-Step Instructions
- Standing at the top of your mat, step back to crescent lunge with the right foot, then slowly lower your back knee down.
- Adjust your legs as necessary to keep the front knee directly over the ankle and your back leg long and in line with your hip.
- Let your head hang down to add a fascial release to this stretch. Stay here for 5 to 8 breaths, gently stretching the hip flexors.
- Switch sides and do the same steps
- Up for the challenge? Close your eyes. You’ll be surprised how hard it can be to keep your balance.
Modifications for Your Safety
- Face the wall for extra balance. Make sure your big toe on your front foot is pressed against the wall
- Put your hands over your front knee if you don’t feel comfortable raising them over your head
- Look forward or downward if you don’t feel comfortable looking up
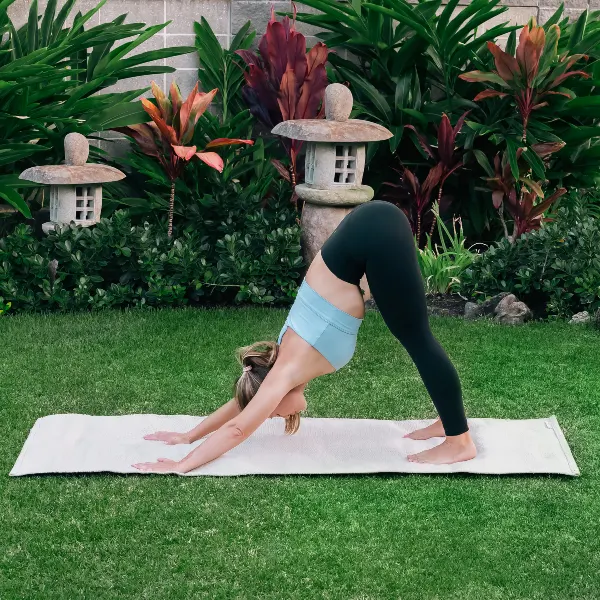
2. Downward-Facing Dog
Adho mukha svanasana is an asana that looks like a dog bending forward to stretch its legs, thus the name. It’s a simple pose that can be done even by a beginner. This is usually done as part of a sequence of poses like the Sun Salutation. Downward-facing Dog has many uses when done within a yoga sequence like transitioning and resting, but it can also be used on its own.
Benefits
- Strengthens your lower back and shoulders
- Decreases back pain
- Strengthens hands, wrists, and legs
- Elongates your shoulders and shoulder blades, cervical spine, and neck
- Increases full-body circulation
- Deepens your respiration
- Relieves headaches
- Decreases anxiety
- Tones your hands and feet
Be Careful if You
- Have high blood pressure
- Have diarrhea
- Have a dislocated shoulder
- Have carpal tunnel syndrome
- Are suffering from weak eye capillaries or a detached retina
Step-By-Step Instructions
- Start by gently peddling the legs out.
- Pause on each side to first notice which one is tighter (are you right-handed and right-leg dominant?). Knowing more about your body will help you to support, release, and equalize your defaults and resulting areas of tightness.
- Hold when it’s tight for up to 5 deep breaths.
- If you are an advanced yogi, you may also try to lift your body with the heels of your feet up.
- Pull your hips up and your pelvis in, then drop your heels back down.
Modifications for Your Safety
Get in front of a wall for support, standing about three feet away then bow forward with your hands still on the wall and your back slightly parallel to the ground.
Use blocks, chairs, or blankets for support.
3. Pigeon Pose
Kapotasana is a backbending asana done kneeling down on the floor that helps release some energy and give more freedom to your spine. It stretches the entire body, opening your chest and stimulating your abdominal organs to help your digestive system work better.
- Have hypertension
- Are insomniac
- Suffer from migraine
- Have back injuries or problems with your back
Be Careful if You
- Have hypertension
- Are insomniac
- Suffer from migraine
- Have back injuries or problems with your back
Step-By-Step Instructions
- From downward dog pose, draw your right knee forward until your shoulders are over your wrists.
- Angle your knee toward the right edge of your mat and the sole of your foot toward your left.
- Lower the right leg to the mat.
- Place a block or blanket under your right sitz bone.
- You can either stay seated to continue getting a hip flexor release or lower your chest to the mat.
- Repeat on the left.
- If you’re feeling more adventurous, get into the inverted staff position over the chair
- Then put your legs under, your hands clasped on its legs
- Hold for about two to five minutes.
Modifications for Your Safety
Make a buddy out of the wall and get support. Slowly lean backward with you soles to the wall. Place your crown on the wall and your forearms should push against it to keep you stable.
Use an exercise ball and a chair. Place it on your back then slowly lean back with your hands stretched and reach towards the chair to keep your pose in place.
4. Runners Lunge
This pose, also called the Ardha Hanumanasana is a sitting half-split stretch pose that helps open up the legs and can be done by anyone at any level of yoga. It’s a good gateway to more advanced poses that help stretch your hamstrings. It can also be a good warm-up for athletes, runners, or cyclists who need to use their lower extremities vigorously.
Benefits
- Prepares you for more advanced poses and full splits
- Releases the tightness in your legs
- Stretches your thighs, hamstrings, and groins
- More flexibility on your legs
- Opens your hips
- Helps relieve sciatica pain
- Stimulates organs in your abdomen
- Tones your reproductive organs
- Lessens stress and fatigue
- Improves your hips’ range of motion
- Improves your balance
- Elongates the spine
- Calms the mind by reducing levels of anxiety and stress
- Stretches your lower back
Be Careful if You
- Are injured or have issues with your hips, hamstrings, pelvic floor muscles, knees, ankles, neck, or lower back.
- Have a slip disc
- Have problems with your internal organs
- Have blood pressure
Step-By-Step Instructions
- From downward dog position, draw both knees down to the mat in table pose.
- Keep your hips over your left knee and extend the right leg forward. This is my favorite hamstring release because it’s effective, and from here you can see which of the three hamstring muscles are the tightest. That’s right—there are three hamstrings, semitendinosus, semimembranosus and biceps femoris—and you can only stretch as far as the tightest one.
- Find which one is tightest by gently, slowly, rotating the foot in a windshield-wiper motion.
- Then hold on the tightest one for 3 to 5 more breaths.
- Switch sides, then step back to table.
- Next, shift to seated and swing both legs around to the front.
Modifications for Your Safety
- Elevate your hands using blocks
- Fold the long edge of your mat over and bring it under your knees
- Roll a blanket or towel and use that as support under your knees
5. Wide-Angle Seated Forward Bend For Inner Groin
Upavistha Konasana is a seated forward-bend pose that opens your hips where your legs are set as wide apart as possible with your hands grasping your toes as you’re leaned forward where your chin and nose are touching the ground. It puts pressure on your inner thighs and the back of the knees to help give it strength and relieve stress in that area.
Benefits
- Stretches your hamstrings
- Helps with circulation in the pelvic region
- Relieves sciatica
- Strengthens your back
- Improves posture
- Detoxifies kidneys and prevents future related issues
- Elongates the spine
- Activates your core muscles
- Helps aid better digestion
- Melts belly fat
- Helps relieve arthritis
- For women, it helps regulate menstrual flow
- Increases blood flow
Be Careful if You
- Are injured or have issues with your hips, hamstrings, pelvic floor muscles, knees, ankles, neck, or lower back.
- Have a slip disc
- Have problems with your internal organs
- Have blood pressure
- Are pregnant
Step-By-Step Instructions
- Open the legs to wide-enough angles that you feel the adductors, your groin muscles, stretch.
- Place your fingertips on the mat between them and lift the heart, letting the lower back drop very gently forward.
- Stay here if you feel enough or continue to slowly lift your heart up first, then lower down (keeping your spine long and lifted).
- Work gently, patiently, and with a sense of compassionate curiosity. This is a chance to learn more about your body, its tendencies, defaults, and tightness—and then to start to therapeutically release and equalize.
Modifications for Your Safety
- You can use one or two blankets under your hips to raise yourself up.
- Place a bolster in front of you and gently fold forward, rolling your pelvis over them.
- Use a belt around each foot.